0
×

Your shopping cart is empty.

View Cart
  • Home
  • Marking Devices
  • Name Plates, Signs, Sign Holders and Name Badges
  • Consecutive Numbering Machines
  • Aerospace Inks
  • Embossers
  • Evidence Collection
  • Stamp Pads
  • Replacement Stamp Pads and Ink Cartridges
  • Stenciling
  • Electic Time Clocks / Perforator Machines
  • Ticket Punches
  • Electric Branding Irons
  • Notary Public Supplies
  • Professional Seals and Stamps
  • Land Surveyor Stamps
  • (M)SDS Technical Data Sheets
  • Monograms and Personalized Stationery Products
  • Reiner Numbering Stamp Video
  • Shiny Heavy Duty Video
  • RibType Video
  • Paint Stripping New Rider 5000 Video
  • How To Change a Trodat Ink Cartridge
  • How To Change a Shiny Printy Pad
  • How To Change the Rubber Die
  • How To Re-Ink Large 3 Fingerprint Pad
  • About HITT Marking
  • Product Catalog
  • Download Catalog
  • In the News
  • Shipping Information
  • Contact

How to Re-Ink COLOP Stamps

SKU: RE-INK-2000-PLUS
Your Price $0.00
Quantity
 

2000 Plus
Trodat Printy Self Inking Stamp
Shiny Printer
Trodat Stock Message Stamps
Stock Stamps
Inspection Stamps
Neoprene Inspection Stamps
Inspector Stamp
Monogram Designer Stamps
Custom Design Stamps
Self-Inking Designer Stamps
Trodat Heavy 

6 easy steps on "How to Re-Ink your COLOP Stamp".

Over time, the ink in your COLOP Stamper can become depleted or the ink pad can dry out. If your stamps are no longer bold or are hard to read, you need to re-ink the stamper by adding fresh ink to the internal ink pad. Re-inking is a straightforward task that will have your COLOP Stamper creating crisp, clear stamps again.

1. Push the stamp down and locate the lock switch on the right side of the stamp. Slide the lock switch over to lock it in place.

2. Open the ink well by gripping both sides of the tray and sliding it out. Note that you do not need to remove the tray, only slide it out--removal can damage the stamp.

3. Squeeze approximately five drops of Ideal ink from the refill container into each of the two holes on the ink tray.

4. Close the ink well by pushing it back in.

5. Wait approximately 15 minutes for the ink to saturate the pad.

6. Slide the lock switch the opposite direction to unlock the stamp and allow it to retract into the ink well.

Test the stamp to verify that the refill was a success by stamping on a clean sheet of paper. A properly refilled stamper should produce bold and clear stamps.

Choose Your Replacement Pad Below
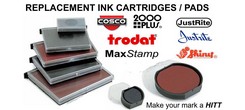
Replacement Stamp Pads
Ink Pads
Replacement Dater Pads


How to Video Below;

How to Re-Ink your 2000 Plus Stamp 

Any questions call us at 714-979-1405 or email us at Sales@HittMarking.com

    Customer Reviews